TL;DR
This tutorial guides you step by step to create your own slash commands, configure reusable skills, orchestrate subagents and automate your workflows with hooks in Claude Code. In 30 minutes, you will know how to customize and extend Claude Code to adapt it to your daily development practices.
This tutorial guides you step by step to create your own slash commands, configure reusable skills, orchestrate subagents and automate your workflows with hooks in Claude Code. In 30 minutes, you will know how to customize and extend Claude Code to adapt it to your daily development practices.
Custom commands and skills in Claude Code form the extensibility system that transforms the AI assistant into a tool tailored to your specific workflows. Claude Code offers four complementary mechanisms: custom slash commands, skills, subagents, and hooks. A single custom command is often the first customization teams adopt.
SFEIR Institute trainings
Claude Code Training
1 day · Fundamentals
AI-Augmented Developer
2 days · Intermediate
What are the prerequisites before getting started?
Before creating your first commands, verify that your environment is ready. You need Claude Code installed and working on your machine. Check the installation and first launch tutorial if you haven't done so already.
Run these checks in your terminal:
claude --version
node --version
| Tool | Minimum version | Recommended version |
|---|---|---|
| Claude Code | Latest version | Latest version |
| Node.js | 18 LTS | 22 LTS |
| npm | 9.x | 10.x |
A CLAUDE.md file is not required to create custom commands, but having one is recommended: it gives Claude Code shared project context that your commands can build on. If you are new to this file, the tutorial on the CLAUDE.md memory system explains how it works in detail.
Total estimated time: approximately 30 minutes.
Key takeaway: a recent version of Claude Code and Node.js 22 are the essential prerequisites; a CLAUDE.md file is a recommended addition rather than a requirement.
How to create your first custom slash command? (~5 min)
A custom slash command is a reusable Markdown prompt that you invoke with /command-name in Claude Code. Concretely, each .md file placed in the .claude/commands/ directory becomes an available command.
Step 1: Create the commands directory in your project.
mkdir -p .claude/commands
Step 2: Create a Markdown file for your command.
touch .claude/commands/review.md
Step 3: Write the prompt for your command in the file.
Analyze the code modified in the current branch.
Check for:
- Potential security vulnerabilities
- Performance issues
- Missing test coverage
Format the output as a Markdown table.
Verification: Launch Claude Code and type /review. The command should appear in the autocomplete and execute your prompt.
claude
# In the session, type: /review
Commands also accept dynamic arguments through the $ARGUMENTS variable. In practice, you can create an /explain command that takes a file name as a parameter.
Explain the file $ARGUMENTS in detail.
List the functions, their roles, and the dependencies.
If your command is not recognized, verify that the file is indeed in .claude/commands/ (not .claude/command/ in singular) and that it has the .md extension.
| Scope | Directory | Availability |
|---|---|---|
| Project | .claude/commands/ | All project members |
| Personal | ~/.claude/commands/ | You only, all projects |
To discover native slash commands, see the tutorial on essential slash commands which covers /init, /compact, and /clear.
Key takeaway: a .md file in .claude/commands/ = a slash command invocable immediately with $ARGUMENTS for parameters.
How to configure skills so the AI learns your patterns? (~5 min)
A skill is an enriched command that allows Claude Code to reproduce your code conventions automatically. Where a simple command sends a prompt, a skill captures a complete pattern: file structure, naming conventions, associated tests.
Create a React component generation skill:
# Skill: Create a React component

Create a React TypeScript component with:
- File: `src/components/$ARGUMENTS.tsx`
- Typed and exported Props interface
- Default export
- Test file: `src/components/__tests__/$ARGUMENTS.test.tsx`
- Minimum 2 tests: default render and props handling

Conventions:
- PascalCase for the component
- camelCase for props
- Use arrow functions
Save this file as .claude/commands/component.md. You then invoke /component Button and Claude Code generates the component, interface, and tests following your conventions.
Skills can significantly reduce repetitive scaffolding work on TypeScript projects. SFEIR Institute uses this mechanism in its training courses to standardize code production between participants.
How to structure an advanced skill?
You can organize your skills in subdirectories to categorize them:
.claude/commands/
├── frontend/
│ ├── component.md
│ ├── hook.md
│ └── page.md
├── backend/
│ ├── endpoint.md
│ └── migration.md
└── test/
 └── integration.md
In practice, the command name comes from the file name without its extension, so frontend/component.md is invoked as /component and backend/endpoint.md as /endpoint. The subdirectories keep your files organized on disk; they do not change how you type the command. If you need explicit namespacing, plugin and skill names use a colon form like plugin-name:skill-name. This organization proves useful once you exceed 5 commands.
To properly manage the context of your prompts in these skills, refer to the context management tutorial which details token limits.
Verification: List your available commands with / in Claude Code. You should see your skills appear by their file name.
Key takeaway: skills capture your complete code patterns (structure, conventions, and tests) and reproduce them in a single slash command.
How to orchestrate subagents for complex tasks? (~7 min)
A subagent is a specialized Claude Code instance that a main agent can launch to process a subtask in parallel. Claude Code can run multiple subagents in parallel, each with its own separate context window.
Configure a skill that uses subagents for a complete project audit:
# Skill: Complete project audit

Launch 3 analyses in parallel:

1. **Security**: Check vulnerable dependencies with
 `npm audit` and analyze dangerous patterns (eval, innerHTML)

2. **Performance**: Measure bundle size, identify
 unused imports and unnecessary React re-renders

3. **Quality**: Check test coverage, strict TypeScript
 typing and remaining TODO/FIXME

Merge the 3 reports into a summary table.
Concretely, Claude Code automatically breaks down this prompt into distributed subtasks. Each subagent processes its part and the results are consolidated.
| Subagent type | Available tools | Use case |
|---|---|---|
| Explore | Read-only, Glob, Grep | Code search |
| general-purpose | All (editing, bash, writing) | Implementation |
| Plan | Read-only, analysis | Architecture and design |
What parameters to configure for subagents?
You control subagent behavior through YAML frontmatter fields defined in a subagent definition file (.claude/agents/), or in the --agents JSON passed on the command line. These fields are not set in the body of a slash command:
maxTurns: limits the number of iterations (recommended around 10 for simple tasks)model: choosehaikufor quick tasks,opusfor deep analyses, orinheritto reuse the main agent's model (the default)permissionMode:planrequires approval,bypassPermissionsfully automates
See the subagents documentation for the full list of frontmatter fields.
Use an Explore subagent to find all untested functions
in src/, then a general-purpose subagent
to generate the missing tests.
Mode: plan (ask for confirmation before writing).
If a subagent loops endlessly, it is often due to a maxTurns that is too high or an ambiguous prompt. Reduce maxTurns to 5 and specify the expected deliverable.
The custom commands cheatsheet summarizes subagent parameters in a printable format.
Key takeaway: subagents let you parallelize heavy tasks. Limit maxTurns and always specify the expected deliverable to avoid loops.
How to automate your workflows with hooks? (~7 min)
A hook is a shell script triggered automatically by an event in Claude Code. Unlike skills (driven by AI), hooks execute deterministic code every time. Claude Code exposes many hook lifecycle events; this tutorial focuses on 4 commonly used ones, and the full list is available in the hooks documentation.
| Event | Trigger | Usage example |
|---|---|---|
PreToolUse | Before tool execution | Validate code format |
PostToolUse | After tool execution | Run tests automatically |
Notification | Notification message | Send a Slack alert |
Stop | End of Claude's response | Generate a summary |
Configure your first hook in the .claude/settings.json file:
{
 "hooks": {
 "PostToolUse": [
 {
 "matcher": "Write|Edit",
 "hooks": [
 { "type": "command", "command": "FILE=$(jq -r '.tool_input.file_path'); npx eslint --fix \"$FILE\"" }
 ]
 }
 ]
 }
}
This hook automatically launches ESLint after each file write or modification. In practice, you get consistent formatting without ever thinking about it.
How to create a pre-commit validation hook?
Add a PreToolUse hook that checks TypeScript typing before any Bash commit operation:
{
 "hooks": {
 "PreToolUse": [
 {
 "matcher": "Bash",
 "hooks": [
 { "type": "command", "command": "if jq -e '.tool_input.command | test(\"git commit\")' >/dev/null; then npx tsc --noEmit; fi" }
 ]
 }
 ]
 }
}
Verification: Modify a .ts file with a type error, then ask Claude Code to commit. The hook should block the commit and display the TypeScript error.
To understand how hooks interact with the permission system, see the permissions and security tutorial which explains authorization levels.
If a hook blocks all operations, check the matcher: a matcher that is too broad like ".*" intercepts absolutely everything. Target precisely the tools concerned.
A hook's execution time depends on the command it runs: linting is usually quick, while a full TypeScript compilation takes longer. Command hooks have a default timeout of 600 seconds (10 minutes), which you can adjust per handler with the timeout field.
Key takeaway: hooks guarantee deterministic automation. Use PostToolUse for automatic linting and PreToolUse for blocking validations.
How to share and reuse your commands as a team? (~3 min)
Commands stored in .claude/commands/ at the project level are versioned with Git. Each team member accesses them automatically after a git pull. This is the recommended mechanism for standardizing practices within a project.
Create a structured directory for a team of 5 developers:
.claude/
├── commands/
│ ├── review.md # Standardized code review
│ ├── deploy.md # Deployment procedure
│ ├── hotfix.md # Urgent fix workflow
│ └── onboarding.md # Guide for new members
├── settings.json # Shared hooks
└── CLAUDE.md # Project conventions
The article on advanced custom commands tips details the most effective sharing patterns for teams.
Personal commands in ~/.claude/commands/ remain private. You can store shortcuts specific to your workflow there without affecting the team. Over time, teams tend to build up a shared library of commands in their Git repository.
To master writing the CLAUDE.md file that accompanies your commands, follow the CLAUDE.md tutorial. It covers documentation best practices.
Key takeaway: version your commands in .claude/commands/ so the entire team benefits from the same standards, and keep ~/.claude/commands/ for your personal shortcuts.
How to debug a command that does not work? (~3 min)
You will sometimes encounter commands that do not produce the expected result. Here is the systematic 4-point diagnostic method.
Check first that the file is properly detected:
ls -la .claude/commands/
Test the prompt directly in a Claude Code conversation without going through the slash command. If the result is correct in direct mode but not via the command, the problem comes from the .md file.
| Symptom | Likely cause | Solution |
|---|---|---|
| Command missing from autocomplete | Wrong directory or extension | Check the path .claude/commands/*.md |
| Incomplete result | Prompt too long | Split into multiple commands |
| Subagent stops too early | maxTurns too low | Raise maxTurns and clarify the deliverable |
| Subagent loops endlessly | maxTurns too high or ambiguous prompt | Lower maxTurns to 5 and specify the expected output |
| Hook timeout | Script exceeds the hook timeout (default 600 s) | Optimize the script or raise the timeout field |
The custom commands FAQ answers the 15 most frequent questions about configuration errors.
To deepen your understanding of building your first conversations with Claude Code and how commands fit into the flow, see the tutorial on your first conversations.
If $ARGUMENTS does not substitute, make sure to write $ARGUMENTS in exact uppercase. Variants like $arguments or $ARGS do not work.
Key takeaway: diagnose in 4 steps: file presence, raw prompt test, parameter verification, then log analysis.
How to go further with custom commands?
You now master the four extensibility pillars of Claude Code: slash commands, skills, subagents, and hooks. Here are avenues to push your configuration further.
Combine hooks and skills to create complete workflows. For example, a /deploy skill that generates a changelog, runs tests via a subagent, then triggers a Slack notification hook after deployment.
# Skill: Deploy to staging

1. Generate the changelog from the last Git tag
2. Run tests via a subagent (mode: bypassPermissions)
3. Execute `npm run build && npm run deploy:staging`
4. The PostToolUse hook will send the Slack notification
SFEIR Institute offers the Claude Code 1-day training to practice these extensibility mechanisms in real-world conditions with guided labs. If you want to integrate Claude Code into a complete development workflow, the AI-Augmented Developer 2-day training covers the full set of AI tools for development. For those who already master the basics, the AI-Augmented Developer -- Advanced training deepens multi-agent orchestration techniques in 1 day.
The reference article on custom commands and skills covers all the concepts discussed here with additional examples.
Three command ideas to create right now
/changelog: Generates a formatted changelog from Git commits between two tags/migrate: Creates a database migration with rollback and tests/perf: Runs a Lighthouse performance audit and summarizes scores in a table
The shared commands ecosystem continues to grow. Community skill repositories are emerging, allowing you to import ready-to-use commands with a simple copy-paste into your .claude/commands/ directory.
Key takeaway: combine skills, subagents, and hooks to build end-to-end automated workflows. Start with a simple command and enrich it progressively.
Recent articles about Claude
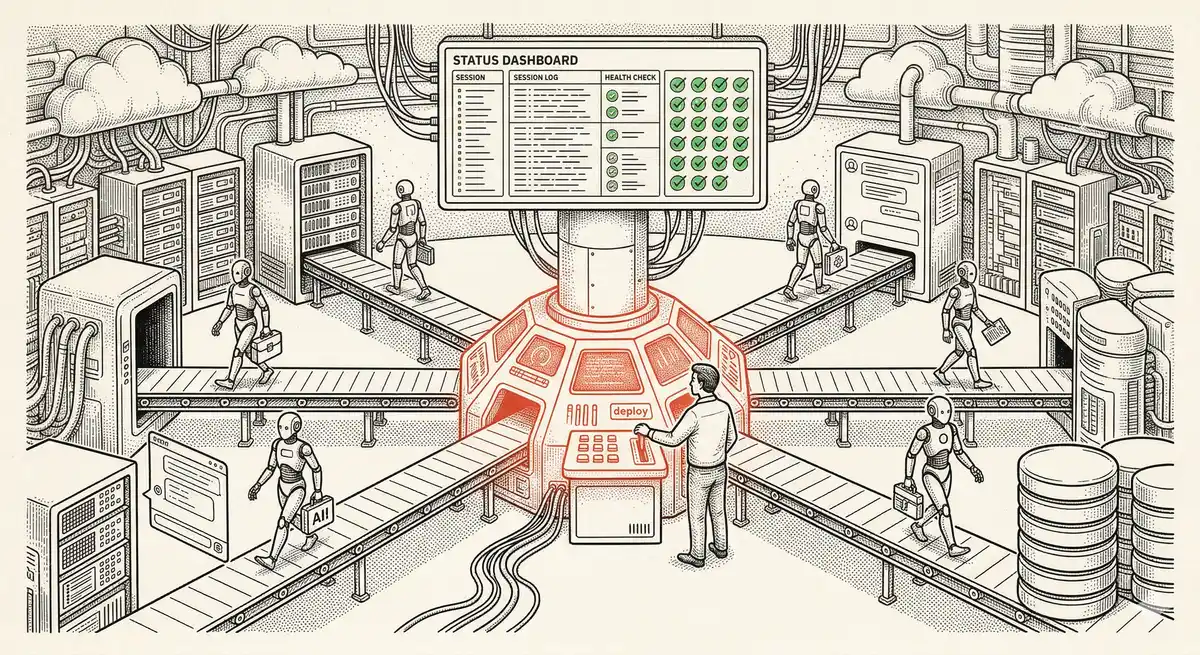
Claude Managed Agents: Anthropic's Platform for Production Agent Deployment
Anthropic launches Managed Agents: a cloud platform for deploying AI agents in production. Secure sandbox, checkpointing, multi-agent, autonomous sessions lasting hours. Notion, Rakuten, Asana and Sentry already use it.
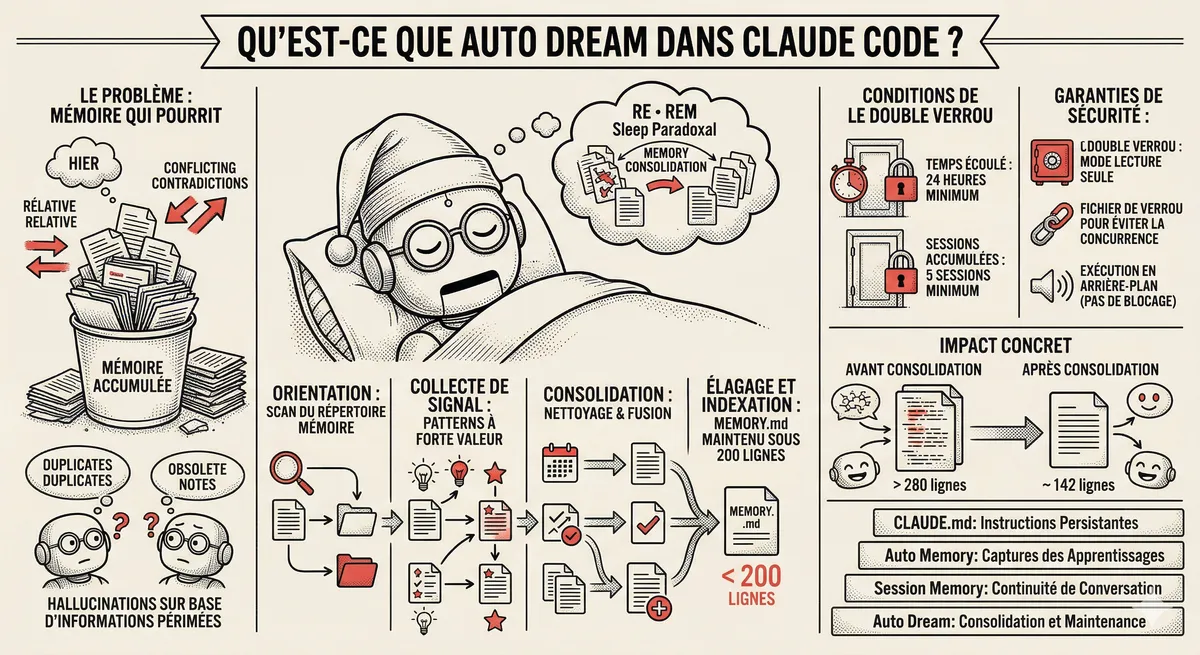
Claude Code Dream & Auto Dream: Automatic Memory Consolidation
After 20 sessions, Auto Memory notes become a mess. Auto Dream solves this by automatically consolidating Claude Code's memory: deduplication, stale entry removal, relative-to-absolute date conversion.
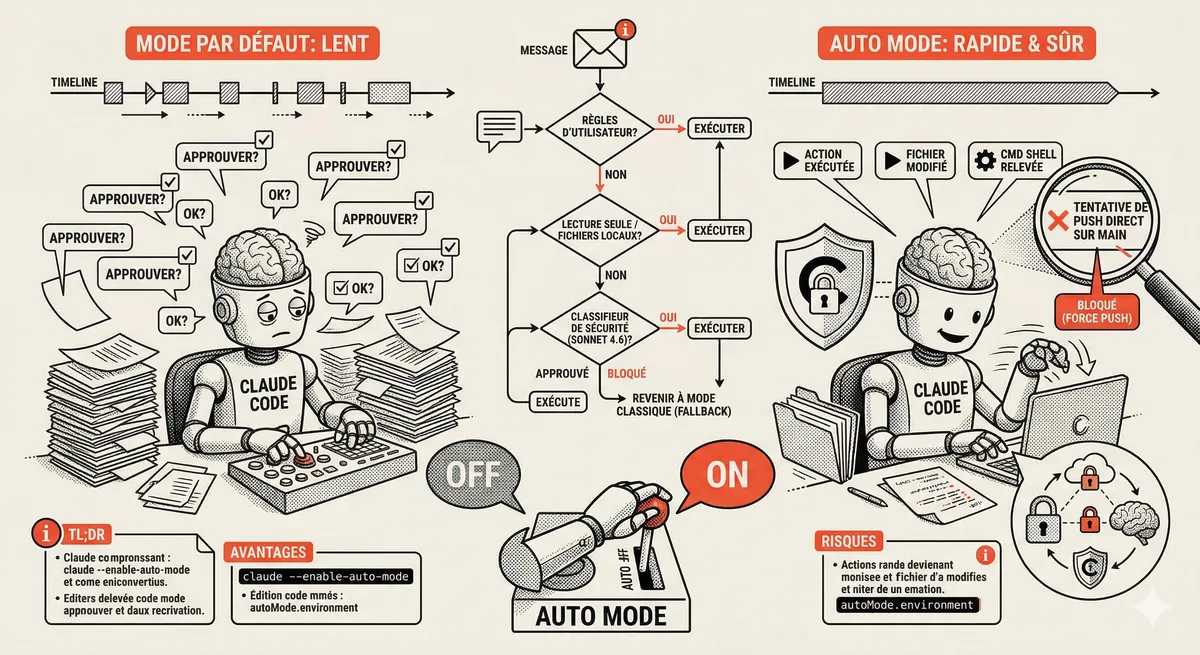
Claude Code Auto Mode: Autonomy Without the Risk
Auto Mode in Claude Code eliminates permission interruptions while keeping a safety net. A classifier analyzes every action before execution and blocks destructive operations. The sweet spot between approving everything and letting everything through.
This topic is covered in Module 5 of our Claude Code training
Sub-agents and Skills
1-day training • 60% hands-on labs • Expert instructors
View full program