TL;DR
Custom commands, skills and hooks in Claude Code let you automate your development workflows and teach your patterns to the AI. Create custom slash commands in minutes, delegate tasks to autonomous subagents and trigger deterministic actions via hooks to save significant time on your repetitive tasks.
Custom commands, skills and hooks in Claude Code let you automate your development workflows and teach your patterns to the AI. Create custom slash commands in minutes, delegate tasks to autonomous subagents and trigger deterministic actions via hooks to save significant time on your repetitive tasks.
Custom commands and skills in Claude Code form an extensibility system that transforms the AI agent into a tailored assistant. Custom commands have been merged into skills, so a .claude/commands/*.md file and a .claude/skills/ file both create the same /command. Claude Code offers several extension mechanisms: skills (and the commands they expose), subagents, hooks, and MCP integrations.
SFEIR Institute trainings
Claude Code Training
1 day · Fundamentals
AI-Augmented Developer
2 days · Intermediate
How to create a custom slash command in Claude Code?
Create a Markdown file in the .claude/commands/ directory of your project to define a custom slash command. Each .md file automatically becomes a command accessible via /.
The file name determines the command name. For example, .claude/commands/review.md creates the /review command. You can organize your commands in subfolders to group them by category.
Here is how to structure your first command:
mkdir -p .claude/commands
touch .claude/commands/review.md
The file content defines the prompt sent to Claude Code. Use the $ARGUMENTS variable to capture parameters passed by the user:
Analyze the file $ARGUMENTS and check:
1. TypeScript typing errors
2. OWASP Top 10 security vulnerabilities
3. Compliance with our ESLint conventions
Suggest concrete fixes with code.
For commands shared across your machine, place them in ~/.claude/commands/. These global commands are available in all your projects.
| Location | Scope | Example usage |
|---|---|---|
.claude/commands/ | Project only | Team conventions, custom review |
~/.claude/commands/ | All projects | Personal templates, shortcuts |
.claude/commands/subfolder/ | Project, grouped | Commands by domain (test, deploy) |
In practice, a custom slash command reduces a 200-word prompt to a 3-word invocation. See the complete custom commands reference to discover advanced syntax with multiple variables.
Key takeaway: a custom slash command is a Markdown file in .claude/commands/. One file = one command.
What are the most common use cases for custom commands?
Custom commands cover four main categories: code review, test generation, documentation, and deployment.
Here concretely are the most commonly created commands by development teams:
#.claude/commands/test-unit.md
Generate unit tests for $ARGUMENTS using:
- Framework: Vitest
- Pattern: AAA (Arrange, Act, Assert)
- Coverage: branches and edge cases
- Mocks: vi.mock for external dependencies
#.claude/commands/doc-api.md
Document the API endpoint in $ARGUMENTS:
- HTTP method and URL
- Required and optional parameters
- Response codes (200, 400, 401, 500)
- Working curl example
as a rule of thumb, teams that adopt a handful of well-chosen custom commands tend to spend noticeably less time on repetitive code review tasks. The essential slash commands provide a solid foundation before creating your own variants.
| Category | Command | Typical benefit |
|---|---|---|
| Code review | /review | Standardizes review criteria across the team |
| Unit tests | /test-unit | Generates consistent tests with one invocation |
| API documentation | /doc-api | Produces uniform endpoint docs on demand |
| Code migration | /migrate | Applies a repeatable migration pattern |
Key takeaway: focus your custom commands on the tasks you repeat most often.
How do skills work in Claude Code?
A skill is a SKILL.md file stored in a dedicated folder under .claude/skills/. Claude Code loads it on demand, when the task at hand matches the skill, and you can also invoke it explicitly as /. A skill packages reusable instructions and workflow steps that Claude follows when it activates.
To teach Claude your always-on conventions and coding preferences, use the separate memory system instead: the CLAUDE.md file at the root of your project, plus nested CLAUDE.md files per directory. The memory system is loaded automatically at the start of every session. The CLAUDE.md memory system details the complete architecture of this persistent memory.
Here is how to declare a skill in .claude/skills/:
# .claude/skills/api-review/SKILL.md
---
name: api-review
description: Review an API endpoint against our conventions
---

Review the API endpoint and check:
- HTTP method, URL and status codes
- Required and optional parameters
- Compliance with our ESLint and security conventions

Suggest concrete fixes with code.
And here is how the memory system holds your conventions in CLAUDE.md:
# Code conventions

## TypeScript
- Use interfaces rather than types for objects
- Name files in kebab-case
- Prefix interfaces with I (IUser, IProduct)
- Always use string enums for statuses

## Tests
- One test file per source file
- Name tests: "should [action] when [condition]"
- Minimum 80% branch coverage
In practice, a concise CLAUDE.md file is enough to align Claude Code with most of your team conventions. The memory is applied from the session start, without any action on your part.
| Mechanism | File | Loading |
|---|---|---|
| Personal skill | ~/.claude/skills/ | On demand, all projects |
| Project skill | .claude/skills/ | On demand, this project |
| Plugin skill | | On demand, when the plugin is installed |
| Project memory | ./CLAUDE.md | Automatic at each session |
| Per-directory memory | ./src/CLAUDE.md | When Claude works in src/ |
| Personal memory | ~/.claude/CLAUDE.md | All projects, all sessions |
Key takeaway: skills are SKILL.md files under .claude/skills/ loaded on demand, while CLAUDE.md is the memory system that teaches your conventions automatically.
Can subagents be used to parallelize tasks?
Launch subagents with Claude Code's Agent tool (formerly Task, renamed in v2.1.63; Task still works as an alias) to execute multiple tasks in parallel and divide complex work. A subagent is an autonomous Claude instance that processes a specific subtask.
Subagents have their own context and can read files, execute commands, and produce results. You can launch several simultaneously for independent tasks. Concretely, an Explore type subagent searches your codebase while a general-purpose type implements a feature.
Here are the subagent types available as of February 2026:
| Subagent type | Capabilities | Use case |
|---|---|---|
general-purpose | Read, write, bash, all tools | Implementation, refactoring |
Explore | Read-only, search | Codebase exploration |
Plan | Read-only, research | Plan design in plan mode |
In practice, running subagents in parallel can substantially cut wall-clock time on independent tasks compared with sequential execution. Discover how agentic coding leverages this parallelization to solve complex problems.
Key takeaway: subagents divide the work. Launch several in parallel for independent tasks.
How to configure hooks to automate actions?
Hooks are shell commands executed automatically by Claude Code in response to specific events. Configure them in the .claude/settings.json file of your project.
A hook triggers deterministically, without AI intervention. This is the fundamental difference with a command or skill: the hook is a reliable and 100% reproducible automation.
{
 "hooks": {
 "PostToolUse": [
 {
 "matcher": "Edit|Write",
 "hooks": [
 {
 "type": "command",
 "command": "FILE=$(jq -r '.tool_input.file_path'); npx eslint --fix \"$FILE\""
 }
 ]
 }
 ],
 "PreToolUse": [
 {
 "matcher": "Bash",
 "hooks": [
 {
 "type": "command",
 "command": "echo 'Bash command detected'"
 }
 ]
 }
 ]
 }
}
Hooks fire on numerous lifecycle events, including PreToolUse, PostToolUse, UserPromptSubmit, SessionStart, SessionEnd, SubagentStop, PreCompact, Notification, and Stop. Each command hook receives its context as a JSON object on stdin (fields such as session_id, cwd, hook_event_name, tool_name, and tool_input); parse it with a tool like jq. The project root is also available as $CLAUDE_PROJECT_DIR.
| Event | Trigger | Typical usage |
|---|---|---|
PreToolUse | Before each tool | Validation, logging |
PostToolUse | After each tool | Linting, formatting |
Notification | On Claude notification | External alerts |
Stop | End of session | Cleanup, report |
You can chain multiple hooks on the same event. Verify that your hook scripts return an exit code of 0 to indicate success. A non-zero code blocks the current action. To explore the security of these automations further, see the permissions and security FAQ.
Key takeaway: hooks automate deterministic actions on specific events: zero AI, 100% reliable.
Which configuration files control commands and skills?
Five main files and directories govern Claude Code extensibility. Verify their presence with the following command:
ls -la .claude/commands/ CLAUDE.md .claude/settings.json
The CLAUDE.md file at the root is the entry point for the memory system (your always-on conventions), while skills live as SKILL.md files under .claude/skills/. The .claude/commands/ directory contains your slash commands. The .claude/settings.json file configures hooks and permissions.
Here concretely is the typical file tree of a well-configured project:
my-project/
├── CLAUDE.md # Project memory / conventions
├── .claude/
│ ├── commands/
│ │ ├── review.md # /review
│ │ ├── test-unit.md # /test-unit
│ │ └── deploy/
│ │ └── staging.md # /deploy/staging
│ └── settings.json # Hooks and permissions
├── src/
│ └── CLAUDE.md # Memory specific to src/
└── tests/
 └── CLAUDE.md # Memory specific to tests/
The installation and first launch guide explains how to initialize this structure from the first use of Claude Code. Also see the custom commands tips to optimize your file tree.
Key takeaway: five files structure your extensions: CLAUDE.md, .claude/commands/, .claude/settings.json and their per-directory variants.
How to share custom commands with your team?
Commit the .claude/commands/ directory to your Git repository to share your commands with the entire team. Every developer who clones the project automatically gets the same slash commands.
Concretely, your .gitignore should NOT exclude .claude/commands/. However, add .claude/settings.local.json to .gitignore for personal configurations.
#.gitignore recommended for Claude Code
.claude/settings.local.json
# DO NOT ignore:
#.claude/commands/
# CLAUDE.md
Larger teams often adopt a review process for new commands. You create a pull request that adds a file to .claude/commands/, the team reviews it like standard code. This practice reduces divergence within a team and keeps everyone aligned on the same workflows.
To go further with team command management, see the custom commands cheatsheet which summarizes all sharing best practices.
Key takeaway: commit .claude/commands/ in Git. Your commands become a versioned team standard.
Is there a plugin marketplace for Claude Code?
Yes. Claude Code has a plugin and marketplace system, though it is not an app-store-style GUI like the VS Code extensions panel. A plugin bundles skills, agents, hooks, and MCP servers, and you install it from a marketplace with /plugin install. Anthropic maintains an official marketplace (claude-plugins-official, available in every installation) and a community marketplace you add with /plugin marketplace add anthropics/claude-plugins-community.
The community also shares commands and configurations via public GitHub repositories. You will find collections of ready-to-use commands for testing, refactoring, and documentation.
Integration with the MCP (Model Context Protocol) allows connecting Claude Code to external tool servers. MCP is an open standard published by Anthropic in 2024 that unifies communication between AI agents and data sources.
{
 "mcpServers": {
 "github": {
 "command": "npx",
 "args": ["-y", "@modelcontextprotocol/server-github"]
 },
 "postgres": {
 "command": "npx",
 "args": ["-y", "@modelcontextprotocol/server-postgres"]
 }
 }
}
In practice, a growing ecosystem of community MCP servers is available on npm. Each server adds specialized tools: database access, web browsing, cloud file management. To understand how these integrations fit into the agentic paradigm, see the agentic coding FAQ.
Key takeaway: install plugins from the official and community marketplaces with /plugin install, and extend further through MCP and community repositories.
How to debug a custom command that does not work?
Run the / command in Claude Code to list all detected commands and immediately identify whether your file is recognized.
Three causes are common with custom commands: an incorrect file path, a missing .md extension, or a UTF-8 encoding issue. Check these points in order.
# Check that the file exists and is readable
file .claude/commands/my-command.md

# Check the encoding
file -I .claude/commands/my-command.md
# Expected: text/plain; charset=utf-8
If your command uses $ARGUMENTS but receives nothing, make sure to pass arguments after the command name: /my-command file.ts. The $ARGUMENTS variable captures all text after the command name.
For hooks that fail silently, add logging in your script:
#!/bin/bash
# Hooks receive their context as JSON on stdin; extract the edited file path with jq.
FILE=$(jq -r '.tool_input.file_path')
echo "[HOOK $(date)] Execution on $FILE" >> /tmp/claude-hooks.log
npx eslint --fix "$FILE" 2>> /tmp/claude-hooks.log
See the first conversations with Claude Code if you are getting started and encountering initial configuration issues.
Key takeaway: list your commands with /, check the path, .md extension and UTF-8 encoding to resolve most problems.
Can you create commands that modify multiple files at once?
Describe in your custom command the scope of files to modify and Claude Code will process them sequentially or in parallel depending on context. A custom command has no limit on the number of files it can target.
Here is an example of a multi-file command to add license headers:
#.claude/commands/add-license.md
Add the following Apache 2.0 license header at the top of
each TypeScript file in $ARGUMENTS:

// Copyright 2026 SFEIR. All rights reserved.
// Licensed under the Apache License, Version 2.0

Do NOT modify files that already have a license header.
Count and list the modified files.
In practice, this command processes a large directory of TypeScript files quickly. Claude Code edits files one at a time with the Edit tool; you can review every change as a diff and undo them with the /rewind checkpoint feature.
The custom commands and skills detail advanced patterns for operations on entire file trees. The permissions mechanism protects you: Claude Code asks for your confirmation before any write in default mode.
Key takeaway: no file limit per command. Describe the scope in the prompt and Claude Code handles the traversal and modifications.
When should you use a hook rather than a custom command?
Use a hook when the action must trigger automatically and deterministically, without human intervention. Use a custom command when you want to invoke the AI on demand.
| Criterion | Hook | Custom command |
|---|---|---|
| Trigger | Automatic (event) | Manual (user) |
| AI intelligence | No (pure shell) | Yes (AI prompt) |
| Reliability | 100% deterministic | Variable (AI response) |
| Execution time | Milliseconds | Seconds to minutes |
| Use case | Linting, formatting, logging | Review, generation, analysis |
Concretely, configure a PostToolUse hook to run Prettier after each file write. Create a custom /review command for in-depth AI code analysis. The hook runs near-instantly and synchronously, while the custom command runs an AI analysis that takes noticeably longer.
The Claude Code training from SFEIR Institute dedicates half a day to creating custom commands and hooks with hands-on labs. You will learn to build a complete automation pipeline in 1 day.
Key takeaway: hook = instant deterministic automation, custom command = on-demand AI invocation.
How to structure skills for a monorepo project?
Place a CLAUDE.md file at each significant level of your monorepo to contextualize instructions based on the package or service. Claude Code loads skills from the current directory and its parents.
monorepo/
├── CLAUDE.md # Global conventions
├── packages/
│ ├── api/
│ │ └── CLAUDE.md # NestJS stack, API conventions
│ ├── web/
│ │ └── CLAUDE.md # Next.js 15 stack, frontend conventions
│ └── shared/
│ └── CLAUDE.md # Shared lib rules
When you work in packages/web/, Claude Code loads both the root CLAUDE.md and the one in packages/web/. The most specific skill prevails in case of conflict. Claude walks up the directory tree and concatenates each CLAUDE.md it finds along the way.
In practice, a large monorepo with several targeted CLAUDE.md files reduces convention errors compared to a single root file, because each package gets instructions tailored to its stack. To go deeper, the AI-Augmented Developer 2-day training covers monorepo architectures and advanced AI agent customization with exercises on real projects.
Key takeaway: one CLAUDE.md per package in a monorepo. Claude Code automatically merges skills from the current path.
What are the pitfalls to avoid with custom commands?
Avoid five frequent errors that neutralize the effectiveness of your custom commands and skills.
- Overly vague prompts: "Improve this code" yields nothing exploitable. Specify the criteria: performance, readability, security.
- Contradictory skills: two
CLAUDE.mdfiles giving opposite instructions create inconsistent results. Audit your skills regularly. - Blocking hooks: a slow hook script slows down the entire session because hooks run synchronously. Keep your hooks fast and lightweight so they do not block your work.
- No
$ARGUMENTS: forgetting this variable makes the command rigid and not reusable. - Too many commands: once you accumulate a large number of custom commands, maintainability drops. Group similar commands.
See the custom commands tips for detailed solutions to each of these pitfalls.
The AI-Augmented Developer -- Advanced training from SFEIR Institute, in 1 day, deepens these best practices with real debugging cases for complex agentic workflows.
Key takeaway: prompt specificity, skill consistency, hook speed: these three principles avoid most problems.
Recent articles about Claude
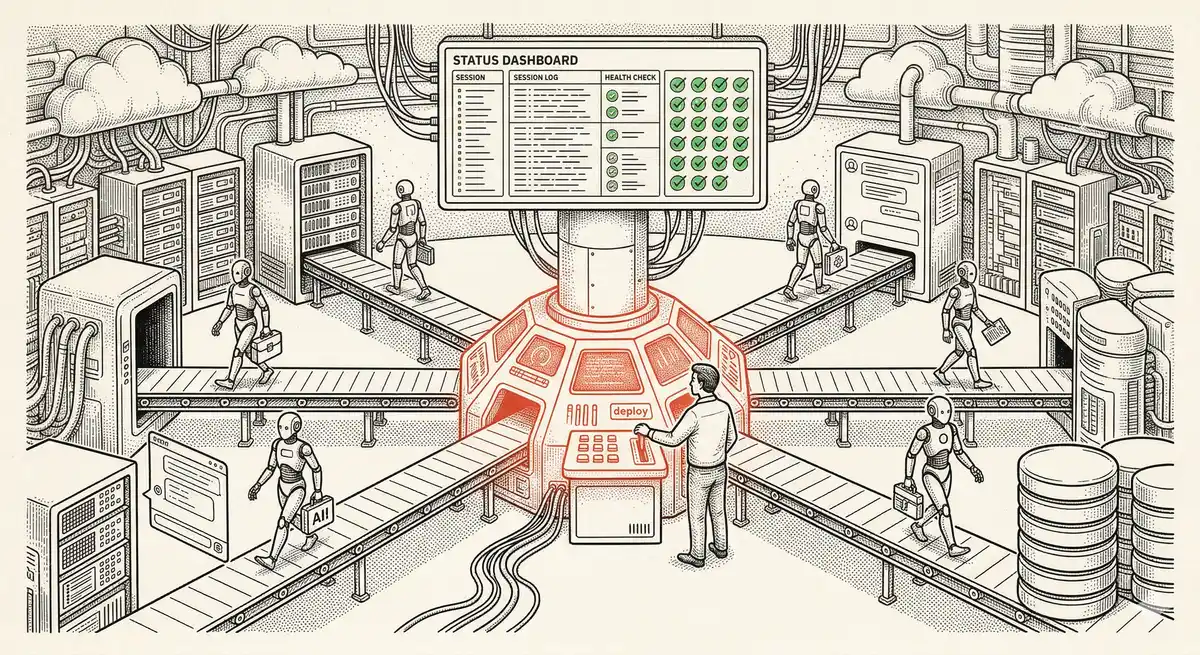
Claude Managed Agents: Anthropic's Platform for Production Agent Deployment
Anthropic launches Managed Agents: a cloud platform for deploying AI agents in production. Secure sandbox, checkpointing, multi-agent, autonomous sessions lasting hours. Notion, Rakuten, Asana and Sentry already use it.
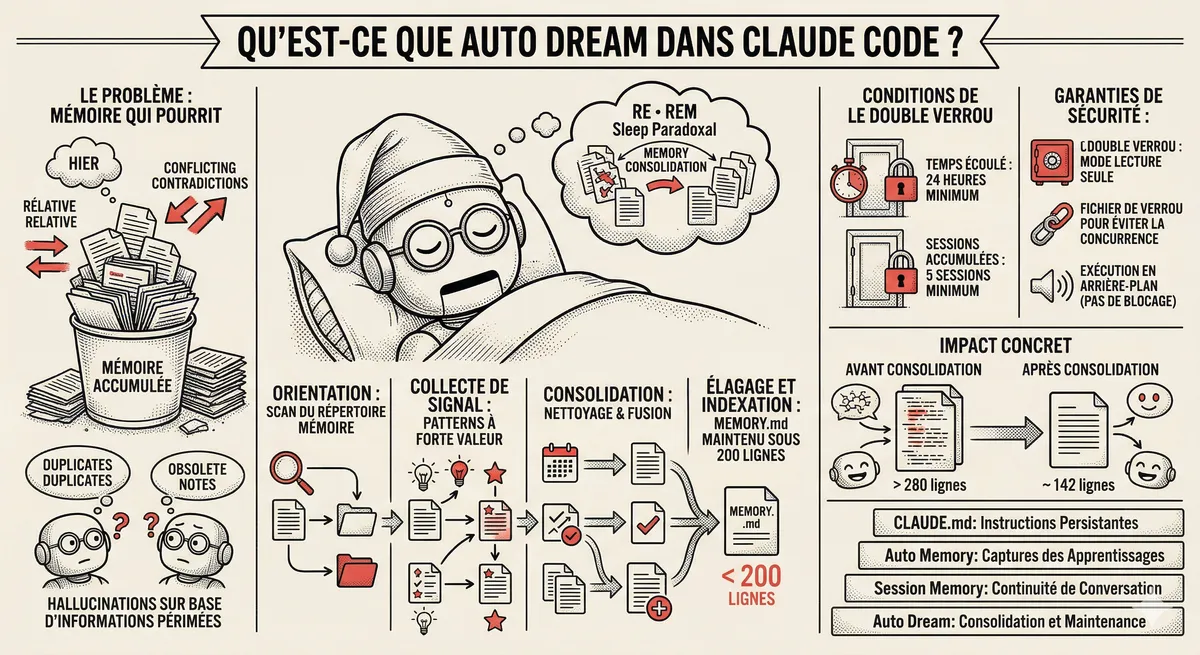
Claude Code Dream & Auto Dream: Automatic Memory Consolidation
After 20 sessions, Auto Memory notes become a mess. Auto Dream solves this by automatically consolidating Claude Code's memory: deduplication, stale entry removal, relative-to-absolute date conversion.
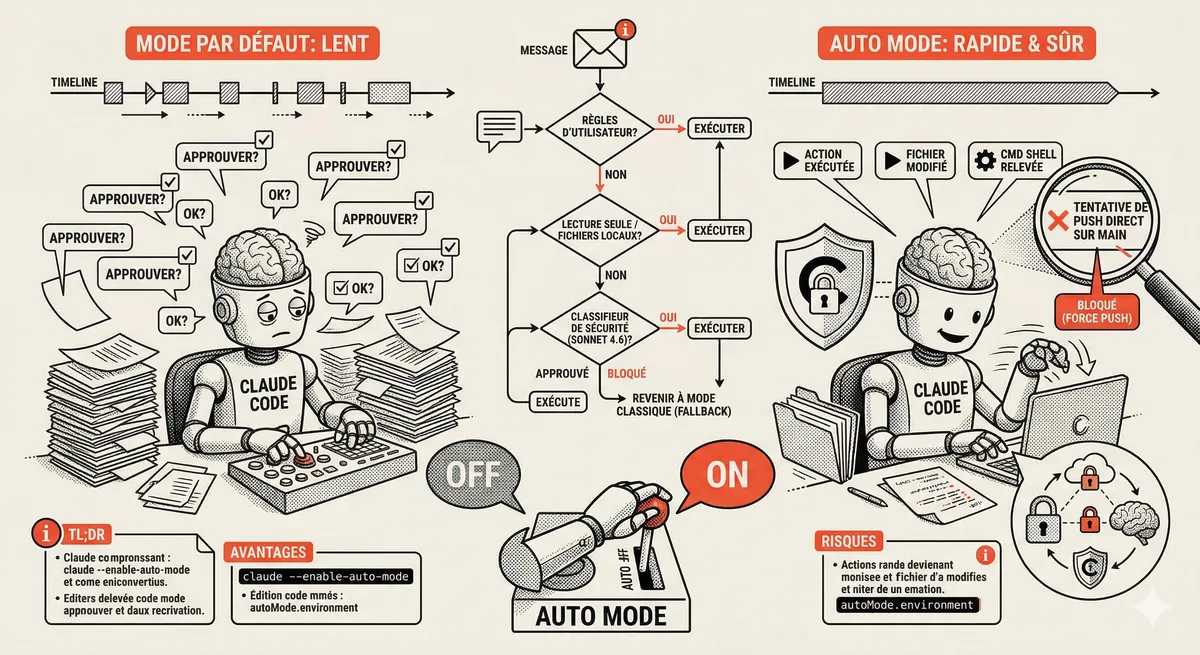
Claude Code Auto Mode: Autonomy Without the Risk
Auto Mode in Claude Code eliminates permission interruptions while keeping a safety net. A classifier analyzes every action before execution and blocks destructive operations. The sweet spot between approving everything and letting everything through.
This topic is covered in Module 5 of our Claude Code training
Sub-agents and Skills
1-day training • 60% hands-on labs • Expert instructors
View full program