TL;DR
This checklist covers every step to install Claude Code and succeed on your first launch without any blockers. Verify system prerequisites, configure your environment, validate authentication, and run your first command in under 15 minutes. Follow this checklist point by point to avoid common setup errors.
This checklist covers every step to install Claude Code and succeed on your first launch without any blockers. Verify system prerequisites, configure your environment, validate authentication, and run your first command quickly. Follow this checklist point by point to avoid common setup errors.
Claude Code is the command-line interface developed by Anthropic that integrates an AI assistant directly into your development terminal. This tool requires precise configuration to work without friction. the majority of problems encountered on first launch stem from a missing or misconfigured prerequisite. This installation and first launch verification checklist guides you through every necessary check.
SFEIR Institute trainings
Claude Code Training
1 day · Fundamentals
AI-Augmented Developer
2 days · Intermediate
How to verify system prerequisites before installation?
Before any installation, check that your machine meets the minimum requirements. A missing prerequisite is the number one cause of first launch failures.
Open your terminal and run each command below to validate your environment. The detailed installation and first launch guide covers these checks in depth. Note that Node.js is not a prerequisite for Claude Code itself; it is only required if you choose the npm install path.
| Prerequisite | Requirement | Verification Command |
|---|---|---|
| Operating system | macOS 13.0+, Ubuntu 20.04+ / Debian 10+ / Alpine 3.19+, Windows 10 1809+ or Windows Server 2019+ (native or WSL 2) | uname -a |
| Account | Claude Pro/Max/Team/Enterprise subscription, a Claude Console account, or a supported cloud provider (Amazon Bedrock, Google Vertex AI, Microsoft Foundry) | - |
| Git | Optional, recommended on native Windows so the Bash tool works | git --version |
| Hardware | 4 GB+ RAM, x64 or ARM64 processor | - |
| Node.js | 18 or later, only if you install via npm | node --version |
Confirm your operating system and account first. The recommended native installer is self-contained and does not require Node.js. You only need to check the Node.js version if you deliberately pick the npm install path.
# Quick check of the core prerequisites
uname -a       # confirm a supported operating system
git --version  # optional, recommended on native Windows
If you plan to use the npm install path and your Node.js version is below 18, install the LTS version via nvm. In practice, nvm lets you manage multiple Node.js versions on the same machine without conflicts.
# Install Node.js 22 via nvm (only needed for the npm install path)
nvm install 22
nvm use 22
nvm alias default 22
Key takeaway: validate a supported operating system, a valid account, and 4 GB+ RAM before moving to the next step. Node.js 18+ is required only if you install Claude Code through npm.
How to install Claude Code?
The recommended way to install Claude Code is the native installer. It downloads a self-contained binary that auto-updates and does not require Node.js. Run the command matching your platform.
# macOS, Linux, WSL
curl -fsSL https://claude.ai/install.sh | bash
# Windows PowerShell
irm https://claude.ai/install.ps1 | iex
:: Windows CMD
curl -fsSL https://claude.ai/install.cmd -o install.cmd && install.cmd && del install.cmd
Package managers are first-class alternatives. On macOS or Linux you can use Homebrew, and on Windows you can use WinGet. Linux distributions are also covered by the native package managers apt (Debian/Ubuntu), dnf (Fedora/RHEL), and apk (Alpine).
# Homebrew (macOS / Linux)
brew install --cask claude-code
# WinGet (Windows)
winget install Anthropic.ClaudeCode
If you prefer npm, it remains a secondary alternative and is the only method that requires Node.js 18 or later. If you encounter permission errors, check the section on common permission and security errors to resolve them.
# npm (alternative, requires Node.js 18+)
npm install -g @anthropic-ai/claude-code
| Installation Method | Command | Notes | |
|---|---|---|---|
| Native installer (macOS/Linux/WSL) | `curl -fsSL https://claude.ai/install.sh \ | bash` | Recommended. Self-contained binary, auto-updates, no Node.js |
| Native installer (Windows PowerShell) | `irm https://claude.ai/install.ps1 \ | iex` | Recommended on Windows. Auto-updates, no Node.js |
| Homebrew (macOS/Linux) | brew install --cask claude-code | No auto-update. Upgrade with brew upgrade claude-code | |
| WinGet (Windows) | winget install Anthropic.ClaudeCode | No auto-update. Upgrade with winget upgrade Anthropic.ClaudeCode | |
| npm (alternative) | npm install -g @anthropic-ai/claude-code | Requires Node.js 18+ |
Verify that the installation succeeded immediately after:
claude --version
# a version number is displayed
If the claude command is not recognized, your PATH is not configured. With the native installer, open a new terminal so the updated PATH is picked up. With the npm path, run npm config get prefix and add the resulting bin directory to your PATH variable.
To update later, run claude update (the native installer keeps itself current automatically). With Homebrew or WinGet, upgrade through your package manager; with npm, reinstall the package.
Key takeaway: the native installer is the recommended path and needs no Node.js. Install, then validate with claude --version.
What checks should you perform for authentication?
Authentication is the step where most developers hit their first blocker. Claude Code requires a valid Anthropic API key or an OAuth connection.
Launch Claude Code for the first time to trigger the authentication flow. On first use, you authenticate in the browser. To switch accounts later, type /login inside a session.
claude
Here is how to configure your API key manually if the automatic flow fails:
export ANTHROPIC_API_KEY="sk-ant-your-key-here"
| Authentication Method | Configuration | Use Case |
|---|---|---|
| OAuth (browser) | Automatic on first launch | Personal use |
| API key (env variable) | export ANTHROPIC_API_KEY=... | CI/CD, scripts |
| API key helper | apiKeyHelper key in settings.json returns a key | Shared environment |
the OAuth method is recommended for many as it automatically handles token renewal.
Verify that your authentication works by running a simple command. If you get a 401 error, your key is invalid or expired. Check the common errors during your first conversations to diagnose the problem.
Key takeaway: prefer OAuth authentication for daily use; reserve the API key for automated environments.
How to validate the first launch in a project?
The first launch should be done in an existing project directory. Claude Code analyzes the project structure to tailor its responses.
Navigate to your project and launch Claude Code:
cd ~/my-project
claude
Run /init to create a CLAUDE.md file at the root of your project. This persistent memory file stores conventions and instructions specific to your codebase. To understand how it works, see the guide on the CLAUDE.md memory system and its common errors.
Here is how to verify that the launch went smoothly:
- Confirm that the interactive input prompt appears in your terminal
- Verify that no red error messages are displayed
- Type a simple command like
claude "explain the structure of this project" - Check that the response mentions actual files from your directory
In practice, the initial scan of a large project completes quickly, though the exact duration depends on project size and disk performance.
If the first launch fails, the installation quickstart offers a 5-step diagnostic.
Key takeaway: always launch Claude Code from the root of a Git project to get optimal context.
What configuration settings should you adjust?
After installation, some default settings are worth adjusting. Configure Claude Code according to your working environment.
Slash commands let you customize the tool's behavior. To master them, explore the essential slash commands and their common errors.
| Setting | Default Value | Recommended Value | Impact |
|---|---|---|---|
| Model | Plan-dependent default | Claude Sonnet 4.6 or Opus 4.8 | Response quality |
| Permissions | Confirmation required | Pre-authorize via settings.json | Productivity |
| Theme | auto | per preference | Readability |
The default model depends on your plan: Claude Sonnet 4.6 on Pro and Team Standard, and Claude Opus 4.8 on Max, Team Premium, Enterprise, and API. You can switch models at any time with the /model command.
Claude Code handles timeouts automatically based on task complexity. No manual configuration is needed for most use cases.
Claude Code asks for confirmation before risky operations. You can pre-authorize tools via permissions.allow in .claude/settings.json.
The context management errors page explains how to optimize the context window size for large projects.
Key takeaway: let Claude Code manage timeouts automatically and pre-authorize your common tools in settings.json for smooth daily usage.
How to diagnose common problems on first launch?
Even with a thorough checklist, some problems can occur. Here is how to identify and resolve them quickly.
| Symptom | Probable Cause | Solution |
|---|---|---|
command not found: claude | PATH misconfigured | Open a new terminal (native installer), or run npm config get prefix then add to PATH (npm path) |
| 401 Unauthorized error | Invalid API key | Regenerate key on console.anthropic.com |
| Timeout on launch | Proxy or firewall | Configure HTTPS_PROXY |
EACCES permission denied | npm permissions | sudo chown -R $(whoami) $(npm config get prefix) |
| Empty responses | API quota exhausted | Check the Anthropic dashboard |
many encounter at least one PATH issue when installing a global CLI tool.
Run the built-in diagnostic command to automatically identify problems:
You can run the diagnostic directly from your shell, or from inside an active session:
# From the terminal
claude doctor

# Or, inside a running session, type on its own line:
/doctor
This command checks your installation health, settings validity, MCP server configuration, and context usage in one pass, and shows the result of the most recent update attempt. Use claude doctor from the terminal for a quick check, or /doctor once you are already in a session.
If you encounter Git-specific issues, the Git integration checklist covers hook configuration and commit conventions. For MCP server issues, refer to the MCP: Model Context Protocol checklist.
Key takeaway: the /doctor command (in session) resolves many problems by automatically identifying the cause.
Why follow this checklist instead of a quick installation?
An unverified installation leads to cascading problems. A developer who skips the checks can lose significant time diagnosing avoidable errors.
This structured checklist ensures that each component works before moving to the next. The step-by-step installation tutorials complement this approach with screenshots and detailed explanations.
Systematic checking of the installation and first launch saves you time in the long run. In practice, teams that use a verification checklist tend to cut down their internal support tickets noticeably.
SFEIR Institute offers a dedicated one-day Claude Code training that covers installation, advanced configuration, and productive workflows through hands-on labs. To go further, the 2-day AI-Augmented Developer training teaches you to integrate Claude Code into your complete development cycle, from prototyping to deployment. Experienced developers can explore the one-day AI-Augmented Developer - Advanced training to master complex use cases like CI/CD pipeline automation.
Key takeaway: a verified installation saves you hours of debugging. Follow each checkpoint in order.
What are the post-installation checkpoints you should not forget?
Once Claude Code is installed and launched, perform these final checks to confirm your environment is fully operational.
Final validation checklist:
- Verify that
claude --versionreturns a recent version - Confirm that
/doctor(in session) reports no errors - Test a simple command:
claude "list the project files" - Check for the presence of the
CLAUDE.mdfile at the project root - Validate that permissions are correctly configured via
/permissions - Run an assisted commit to test Git integration
- Check token consumption on the Anthropic dashboard
SFEIR supports development teams in adopting these AI tools. Post-installation verification takes only a few minutes and ensures a stable environment.
Each point in this checklist corresponds to a documented error source. The common installation errors page groups the most frequent cases encountered by the community.
Key takeaway: these 7 post-installation checks take only a few minutes and guarantee a fully functional Claude Code environment.
Recent articles about Claude

Claude Managed Agents: Anthropic's Platform for Production Agent Deployment
Anthropic launches Managed Agents: a cloud platform for deploying AI agents in production. Secure sandbox, checkpointing, multi-agent, autonomous sessions lasting hours. Notion, Rakuten, Asana and Sentry already use it.

Claude Code Dream & Auto Dream: Automatic Memory Consolidation
After 20 sessions, Auto Memory notes become a mess. Auto Dream solves this by automatically consolidating Claude Code's memory: deduplication, stale entry removal, relative-to-absolute date conversion.
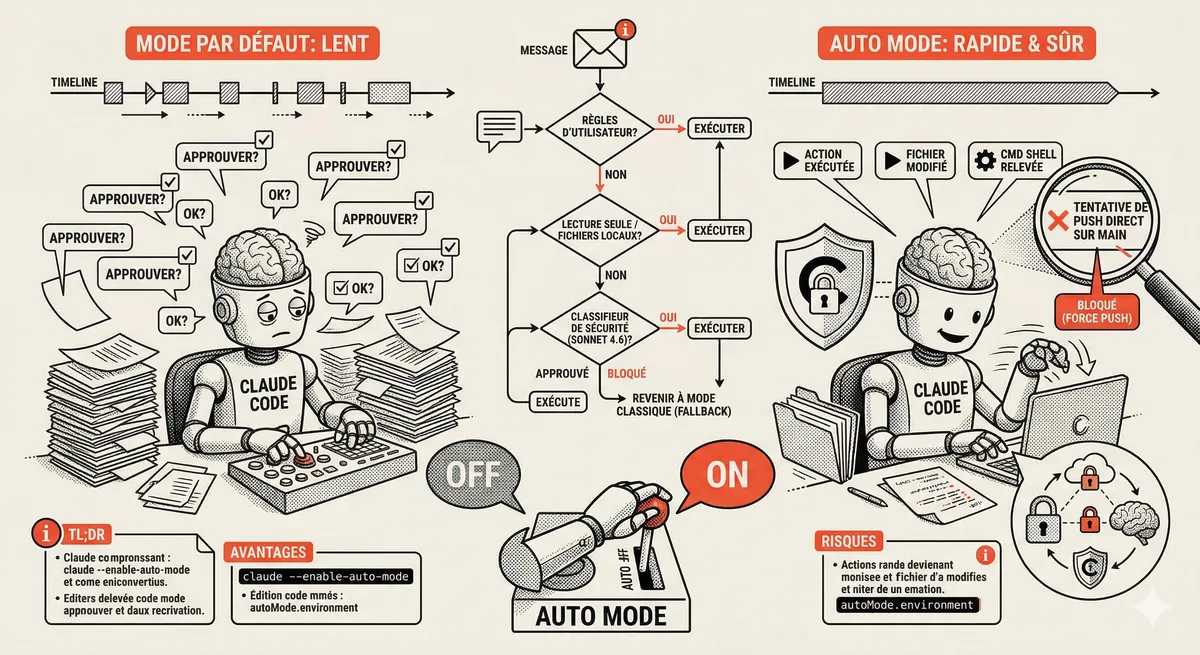
Claude Code Auto Mode: Autonomy Without the Risk
Auto Mode in Claude Code eliminates permission interruptions while keeping a safety net. A classifier analyzes every action before execution and blocks destructive operations. The sweet spot between approving everything and letting everything through.
This topic is covered in Module 2 of our Claude Code training
Claude Code Installation and Configuration
1-day training • 60% hands-on labs • Expert instructors
View full program