TL;DR
This tutorial shows you how to automate Claude Code in non-interactive mode within your CI/CD pipelines. You will learn to use the `-p` flag to run prompts in a single command, configure GitHub Actions, parse the different output formats, and orchestrate programmatic multi-turn sessions.
This tutorial shows you how to automate Claude Code in non-interactive mode within your CI/CD pipelines. You will learn to use the -p flag to run prompts in a single command, configure GitHub Actions, parse the different output formats, and orchestrate programmatic multi-turn sessions.
Claude Code's headless mode is the ability to run the AI assistant from the command line without an interactive interface, directly in a script or continuous integration pipeline. This feature transforms DevOps workflows by enabling the integration of generative AI at every stage of the development cycle.
Headless mode is widely used by advanced Claude Code users to automate code review, test generation, and documentation tasks.
To understand the fundamentals before diving into automation, check out the installation and first launch tutorial which covers the initial setup of the tool.
SFEIR Institute trainings
Claude Code Training
1 day · Fundamentals
AI-Augmented Developer
2 days · Intermediate
What are the prerequisites before getting started?
Verify that your environment meets these conditions before following this step-by-step guide.
| Prerequisite | Minimum version | Verification command |
|---|---|---|
| Node.js | 18.x or later | node --version |
| Claude Code CLI | Latest version | claude --version |
| Anthropic API key | ANTHROPIC_API_KEY | echo $ANTHROPIC_API_KEY |
| Git | 2.40+ | git --version |
| GitHub CLI (optional) | 2.60+ | gh --version |
Export your API key in your terminal for the following steps:
export ANTHROPIC_API_KEY="sk-ant-api03-your-key-here"
Because there is no interactive browser login in CI, headless mode needs non-interactive credentials. These can be either ANTHROPIC_API_KEY (API billing) or a long-lived OAuth token generated by claude setup-token and exposed as CLAUDE_CODE_OAUTH_TOKEN (subscription billing). The total time for this tutorial is approximately 30 minutes.
If you are new to command-line interactions, the guide on your first conversations will give you the necessary foundations.
If you see Error: Missing API key, verify that the environment variable is properly exported in the same shell or in your CI secrets.
Key takeaway: headless mode requires Node.js 18+, Claude Code (latest version), and an API key configured as an environment variable.
How to use the -p flag to run Claude Code in a single command?
The -p flag (for print) is the entry point to headless mode. It sends a single prompt to Claude Code and retrieves the response directly on standard output, without opening an interactive session.
Step 1: Run your first headless command (~2 min)
Launch Claude Code with a simple prompt:
claude -p "Explain what the package.json file does in this project"
Verification: the response is displayed directly in the terminal, then the process terminates with exit code 0.
Step 2: Redirect the output to a file (~1 min)
Redirect the result to a Markdown file for archiving:
claude -p "Generate documentation for the exported functions" > docs/api-reference.md
Verification: open the file docs/api-reference.md and confirm it contains structured Markdown.
Step 3: Combine with Unix pipes (~2 min)
Pipe content to Claude Code via stdin:
cat src/utils.ts | claude -p "Add JSDoc comments to each function"
Verification: the commented code is displayed on stdout. The original file remains intact.
Note: piped stdin is capped at 10MB (v2.1.128+). For larger inputs, write the content to a file and reference its path in the prompt instead of piping it.
Concretely, the -p flag also accepts the --max-turns option to limit the number of agent iterations. By default there is no turn limit; use --max-turns N to cap the number of agentic iterations, after which Claude Code exits with an error when the limit is reached.
To master context management during long sessions, refer to the context management tutorial.
| Option | Description | Example |
|---|---|---|
-p "prompt" | Runs a single prompt | claude -p "code summary" |
--max-turns N | Limits iterations | claude -p "..." --max-turns 3 |
--output-format | Sets the output format | claude -p "..." --output-format json |
--allowedTools | Restricts available tools | claude -p "..." --allowedTools "Read,Grep" |
If you seeError: stdin is not a TTY, it means Claude Code is trying to open interactive mode in a non-TTY environment. Add the-pflag to force headless mode.
Key takeaway: the -p flag turns Claude Code into a standard CLI tool compatible with pipes, redirections, and shell scripts.
How to integrate Claude Code into GitHub Actions?
GitHub Actions is the most commonly used CI/CD platform with Claude Code in headless mode. Here is how to configure a complete workflow.
Step 4: Create the workflow file (~3 min)
Create the directory and the GitHub Actions configuration file:
#.github/workflows/claude-review.yml
name: Claude Code Review
on:
 pull_request:
 types: [opened, synchronize]

permissions:
 contents: read
 pull-requests: write

jobs:
 review:
 runs-on: ubuntu-latest
 steps:
 - uses: actions/checkout@v4
 with:
 fetch-depth: 0

 - uses: actions/setup-node@v4
 with:
 node-version: '22'

 - name: Install Claude Code
 run: npm install -g @anthropic-ai/claude-code

 - name: Run Code Review
 env:
 ANTHROPIC_API_KEY: ${{ secrets.ANTHROPIC_API_KEY }}
 run: |
 DIFF=$(git diff origin/main...HEAD)
 echo "$DIFF" | claude -p \
 "Analyze this diff. List potential bugs, security issues, and improvement suggestions. Format: Markdown." \
 --output-format text > review.md

 - name: Post Review Comment
 uses: actions/github-script@v7
 with:
 script: |
 const fs = require('fs');
 const review = fs.readFileSync('review.md', 'utf8');
 github.rest.issues.createComment({
 owner: context.repo.owner,
 repo: context.repo.repo,
 issue_number: context.issue.number,
 body: `## Claude Code Review\n\n${review}`
 });
Verification: push this file to a branch, open a PR, and observe the automatic review comment.
The permissions and security system will allow you to precisely control the actions Claude Code can perform in your pipeline.
Step 5: Secure the API secret (~2 min)
Add your API key to the GitHub repository secrets:
gh secret set ANTHROPIC_API_KEY --body "sk-ant-api03-your-key"
secrets are encrypted with libsodium and are never exposed in logs. The cost of a code review depends on the diff size and the model you choose, so it scales with the volume of tokens processed.
If you seeError: Resource not accessible by integration, check the workflow permissions in the YAMLpermissionsblock.
Key takeaway: an automated review GitHub Actions workflow can be set up in 5 minutes with a single YAML file and an API secret.
Which output formats to choose and how to parse them?
Claude Code offers three output formats in headless mode: text, json, and stream-json. Each format addresses a specific need in your automation scripts.
Step 6: Explore the three output formats (~3 min)
Test each format to understand their structure:
# Plain text format (default)
claude -p "List 3 TypeScript best practices" --output-format text

# Structured JSON format
claude -p "List 3 TypeScript best practices" --output-format json

# Streaming JSON format (stream-json requires --verbose in print mode)
claude -p "List 3 TypeScript best practices" --output-format stream-json --verbose
The json format returns a structured object with complete response metadata.
| Format | Primary use | Typical size | Parsing |
|---|---|---|---|
text | Simple scripts, logs | ~1 KB | Direct reading |
json | API integration, post-processing | ~3 KB | jq, JSON.parse() |
stream-json | Progressive display, long output | Variable | Line by line |
Step 7: Parse JSON output with jq (~2 min)
Extract the response content with jq:
claude -p "Analyze the complexity of this code" --output-format json | jq -r '.result'
To extract the request cost in tokens:
claude -p "Summarize this file" --output-format json | jq '{
 input_tokens:.usage.input_tokens,
 output_tokens:.usage.output_tokens,
 cost_usd:.total_cost_usd
}'
In practice, the JSON object includes fields such as result, usage, model, session_id, total_cost_usd, and is_error. For a quick overview of available options, check out the headless mode cheatsheet.
Verification: the jq command should return a JSON object with populated input_tokens and output_tokens fields.
Step 8: Process streaming in real time (~3 min)
Parse the stream-json stream line by line in Python:
import subprocess
import json

process = subprocess.Popen(
 ["claude", "-p", "Generate 5 unit tests", "--output-format", "stream-json", "--verbose"],
 stdout=subprocess.PIPE,
 text=True
)

for line in process.stdout:
 event = json.loads(line.strip())
 if event.get("type") == "assistant":
 for block in event["message"]["content"]:
 if block.get("type") == "text":
 print(block["text"], end="", flush=True)
The stream-json format emits one JSON event per line. Each event contains a type field that can be system, assistant, user, or result. Tool calls appear as tool_use/tool_result content blocks nested inside the assistant/user message content.
If you see JSON parsing errors, verify that you are reading line by line and not the entire stream at once.
Key takeaway: use text for simple scripts, json for structured post-processing, and stream-json for progressive display.
How to orchestrate programmatic multi-turn sessions?
A multi-turn session allows you to chain multiple prompts within the same conversational context, which is essential for complex tasks requiring multiple steps.
Step 9: Resume an existing session (~3 min)
Launch a first command and retrieve the session identifier:
# First command: retrieve the session_id
SESSION=$(claude -p "Analyze the project structure" \
 --output-format json | jq -r '.session_id')

echo "Session ID: $SESSION"

# Second command: continue in the same context
claude -p "Now generate the tests for the identified files" \
 --resume "$SESSION" \
 --output-format json | jq -r '.result'
Concretely, the session_id preserves all the context from the previous conversation. The size of the context window is determined by the model you select, not by headless mode, so it varies depending on the model in use.
The CLAUDE.md memory system complements this approach by persisting instructions between sessions.
Step 10: Script a multi-step workflow (~5 min)
Create a Bash script orchestrating multiple steps with shared context:
#!/bin/bash
set -euo pipefail

PROJECT_DIR=$(pwd)
OUTPUT_DIR="$PROJECT_DIR/.claude-ci"
mkdir -p "$OUTPUT_DIR"

# Step 1: Analysis
echo "Analyzing the project..."
RESULT=$(claude -p "Analyze the files modified in the last commit. \
 List the files and their role." \
 --output-format json)

SESSION_ID=$(echo "$RESULT" | jq -r '.session_id')
echo "$RESULT" | jq -r '.result' > "$OUTPUT_DIR/analysis.md"

# Step 2: Test generation
echo "Generating tests..."
claude -p "For each identified file, generate a Jest unit test." \
 --resume "$SESSION_ID" \
 --output-format json | jq -r '.result' > "$OUTPUT_DIR/tests.md"

# Step 3: Security review
echo "Security review..."
claude -p "Identify potential vulnerabilities in these files." \
 --resume "$SESSION_ID" \
 --output-format json | jq -r '.result' > "$OUTPUT_DIR/security.md"

echo "Pipeline complete. Results in $OUTPUT_DIR/"
Verification: run the script and verify that the three Markdown files are created in .claude-ci/.
To restrict the tools accessible to Claude Code in your automated scripts, the permissions and security tutorial details each option.
If you seeError: Session not found, thesession_idpassed to--resumedoes not point to a valid, persisted session. Sessions are persisted to disk and resumed by ID, but they are not retained if--no-session-persistencewas used. Verify the session ID, or start a new session.
Key takeaway: multi-turn sessions with --resume allow you to chain complex tasks while preserving conversational context.
What are the advanced CI/CD use cases?
Beyond code review, headless mode opens up advanced automation possibilities in your pipelines.
Step 11: Automate changelog generation (~3 min)
Configure an automatic changelog generation job:
#!/bin/bash
LAST_TAG=$(git describe --tags --abbrev=0 2>/dev/null || echo "HEAD~10")

git log "$LAST_TAG"..HEAD --pretty=format:"%h %s" | claude -p \
 "Transform this list of commits into a structured changelog. \
 Categories: Features, Bug Fixes, Performance, Breaking Changes. \
 Markdown format with links to commits." \
 --output-format text > CHANGELOG-draft.md
Automating changelog generation this way removes most of the manual effort of writing release notes by hand, letting the pipeline draft them straight from the commit history.
Step 12: Create a quality gate with scoring (~3 min)
Implement a quality gate that blocks the PR if the score is insufficient:
#!/bin/bash
SCORE=$(claude -p "Analyze this diff and assign a quality score from 0 to 100. \
 Criteria: readability, error coverage, conventions. \
 Reply ONLY with the number." \
 --output-format text | tr -d '[:space:]')

echo "Quality score: $SCORE/100"

if [ "$SCORE" -lt 70 ]; then
 echo "Insufficient score ($SCORE < 70). PR blocked."
 exit 1
fi

echo "Acceptable score ($SCORE >= 70). PR validated."
You can explore more headless mode usage tips to refine your automations.
Usage with other CI platforms
Headless mode works with all major CI/CD platforms. Adapt the configuration to your environment:
| CI Platform | Secret variable | Installation command |
|---|---|---|
| GitHub Actions | secrets.ANTHROPIC_API_KEY | npm i -g @anthropic-ai/claude-code |
| GitLab CI | $ANTHROPIC_API_KEY (CI variable) | npm i -g @anthropic-ai/claude-code |
| Jenkins | Credentials binding | sh 'npm i -g @anthropic-ai/claude-code' |
| CircleCI | Context / env variable | npm i -g @anthropic-ai/claude-code |
In practice, GitHub Actions and GitLab CI are both commonly used to run Claude Code in CI/CD.
Check out the headless mode FAQ for frequently asked questions about multi-platform compatibility.
Verification: run your quality gate script on a test file and verify that it returns a numeric score.
Key takeaway: headless mode adapts to all CI/CD use cases (changelogs, quality gates, documentation, tests) on any platform.
How to secure and optimize your headless pipelines?
Security and performance are major concerns when integrating AI into your automated pipelines.
Restrict available tools with --allowedTools to limit the attack surface:
# Read-only: Claude can only read and search
claude -p "Analyze this code" \
 --allowedTools "Read,Grep,Glob" \
 --output-format json
The --allowedTools flag accepts a comma-separated list. In CI/CD mode, SFEIR Institute recommends always restricting tools to the strict minimum. The Bash tool should be excluded in review pipelines to prevent uncontrolled code execution.
To master the essential commands available in Claude Code, refer to the slash commands tutorial.
| Security profile | Allowed tools | Use case |
|---|---|---|
| Read-only | Read,Grep,Glob | Code review, analysis |
| Controlled editing | Read,Grep,Glob,Edit | Automatic refactoring |
| Full | All | Project generation (sandbox) |
The cost of a headless execution depends on the model and the volume of tokens processed, so it grows with context size and PR volume. Track your actual spend through the official pricing and usage dashboard rather than relying on a fixed estimate.
If you want to dive deeper into all the headless mode and CI/CD possibilities, the reference page covers each option in detail.
If you seeError: Tool not allowed, verify that the tool required by the prompt is in the--allowedToolslist.
Key takeaway: always restrict tools to the minimum necessary and budget your API costs based on PR volume.
How to go further with Claude Code in CI/CD?
This tutorial has shown you the fundamentals of headless mode. Here are the next steps to deepen your mastery.
Explore these complementary resources to refine your configuration:
- Persistent memory: the CLAUDE.md system allows you to store reusable instructions between headless sessions
- Advanced formats: the headless mode cheatsheet summarizes all CLI options on a single page
- Troubleshooting: the headless mode FAQ covers the 15 most frequent errors
- Best practices: the advanced tips detail proven automation patterns
To build skills in a structured way, SFEIR Institute offers the Claude Code training over one day, with hands-on labs covering headless mode and CI/CD integration. If you want to go beyond and integrate AI into your entire development workflow, the AI-Augmented Developer training over two days covers complete automation strategies.
For already experienced practitioners, the AI-Augmented Developer - Advanced training in one day dives deeper into advanced CI/CD use cases and multi-agent architectures.
Headless mode is a tool that improves with practice. Start with a simple use case (automatic code review) then gradually expand your automation coverage.
Key takeaway: Claude Code's headless mode transforms your CI/CD pipeline into an intelligent assistant capable of analyzing, generating, and validating code at every commit.
Recent articles about Claude
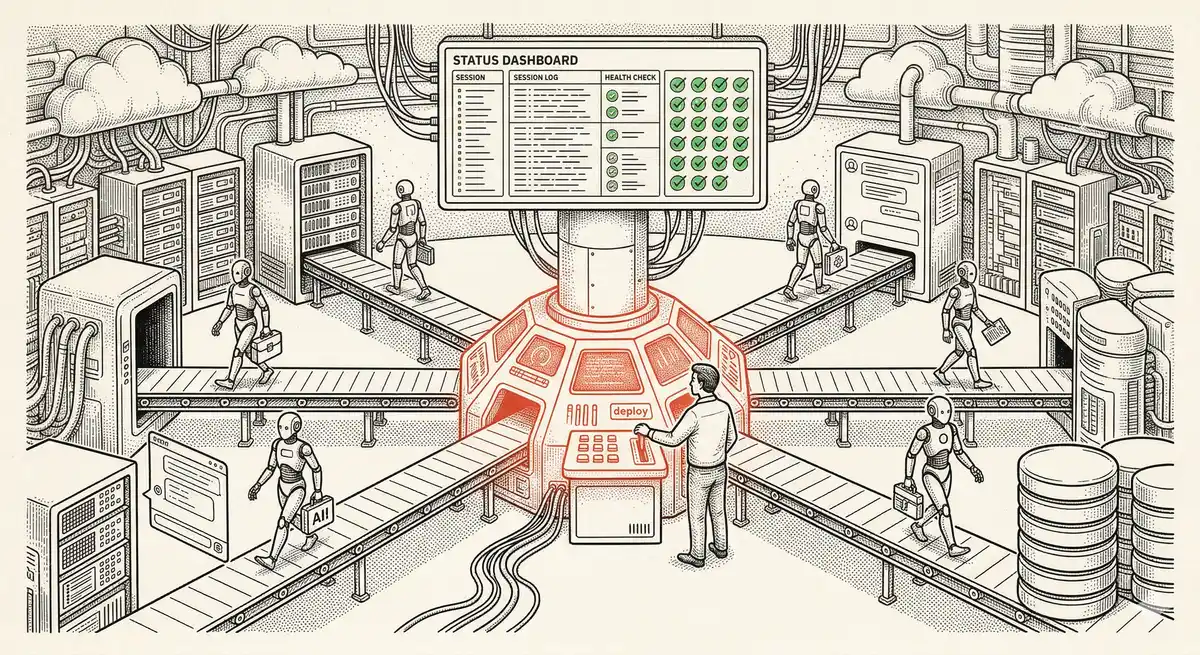
Claude Managed Agents: Anthropic's Platform for Production Agent Deployment
Anthropic launches Managed Agents: a cloud platform for deploying AI agents in production. Secure sandbox, checkpointing, multi-agent, autonomous sessions lasting hours. Notion, Rakuten, Asana and Sentry already use it.
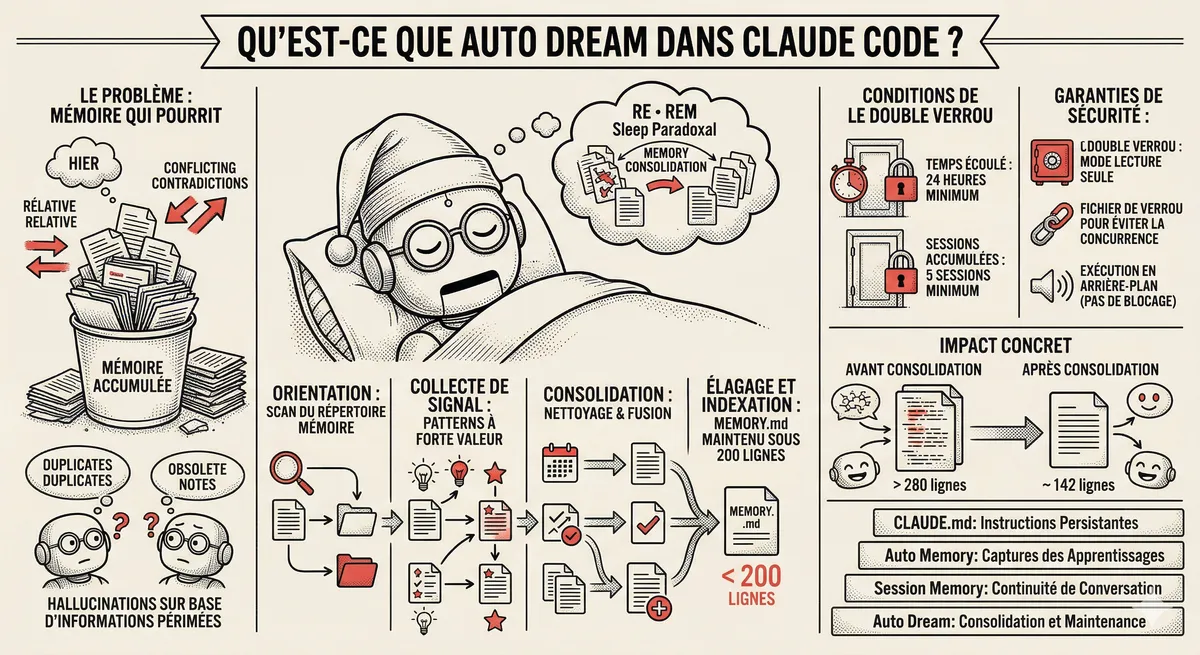
Claude Code Dream & Auto Dream: Automatic Memory Consolidation
After 20 sessions, Auto Memory notes become a mess. Auto Dream solves this by automatically consolidating Claude Code's memory: deduplication, stale entry removal, relative-to-absolute date conversion.
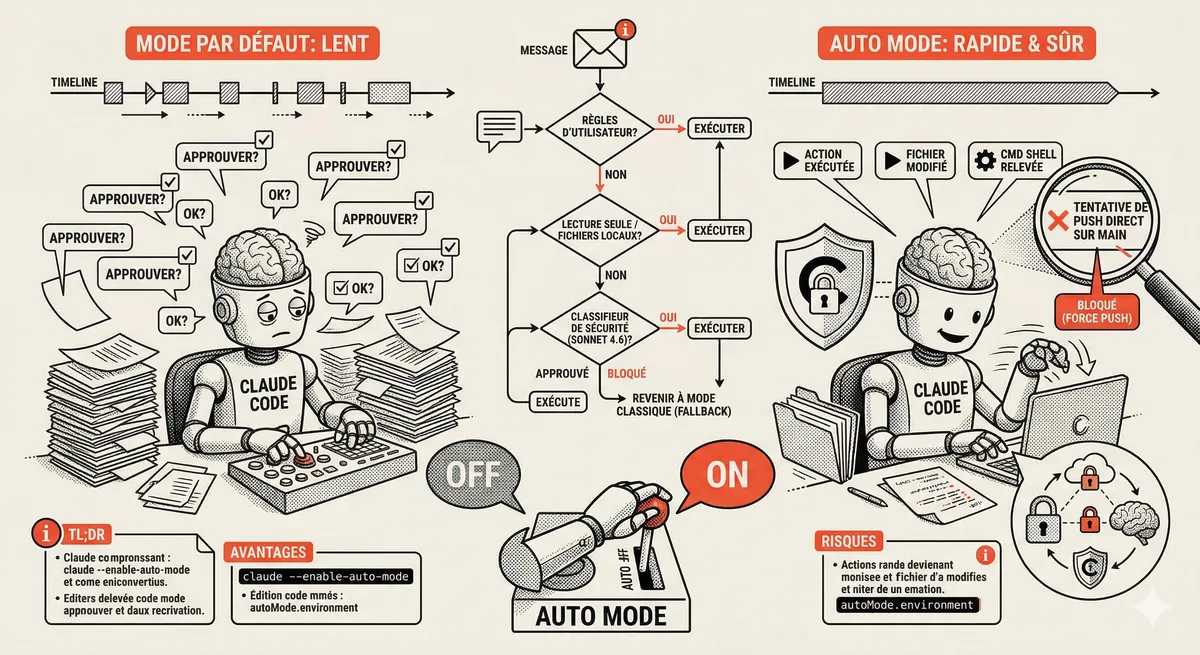
Claude Code Auto Mode: Autonomy Without the Risk
Auto Mode in Claude Code eliminates permission interruptions while keeping a safety net. A classifier analyzes every action before execution and blocks destructive operations. The sweet spot between approving everything and letting everything through.
Claude Code Training
Master Claude Code fundamentals in 1 day with our expert instructors. 60% hands-on practice on real-world cases.
Discover the training