TL;DR
This tutorial guides you step by step to master Git integration in Claude Code - from conversational commits to automated pull requests, including conflict resolution and checkpoints. You will learn to configure and leverage each Git feature directly from your intelligent terminal.
This tutorial guides you step by step to master Git integration in Claude Code: from conversational commits to automated pull requests, including conflict resolution and checkpoints. You will learn to configure and leverage each Git feature directly from your intelligent terminal.
Claude Code's Git integration is a set of commands and automations that allow you to manage your Git repositories without leaving your conversational session. Claude Code handles commits, branches, pull requests, conflict resolution, and checkpoints through a natural language interface.
Many using Claude Code leverage its Git features daily. This integration can noticeably reduce the time spent on routine version management compared to a traditional manual Git workflow.
SFEIR Institute trainings
Claude Code Training
1 day · Fundamentals
AI-Augmented Developer
2 days · Intermediate
What are the prerequisites before starting?
Before following this step-by-step tutorial on Git integration, verify that your environment meets these conditions.
| Prerequisite | Minimum version | Verification command |
|---|---|---|
| Node.js | 18+ | node --version |
| Git | Any recent version | git --version |
| Claude Code | Latest version | claude --version |
| Anthropic account | Pro, Max, Team, Enterprise, or Console account (or a supported API provider such as Bedrock, Vertex AI, or Foundry) | - |
Run these commands in your terminal to validate your installation:
node --version # v18+ expected
git --version # Git installed
claude --version # latest version expected
Most startup errors come from an unsupported Node.js version or an unconfigured Git. Check the installation and first launch guide if any of these commands fail.
The estimated duration for the entire tutorial is 25 to 35 minutes. Each step indicates its own duration.
Key takeaway: verify Node.js 18+, Git, and Claude Code (latest version) before any manipulation.
How to create smart conversational commits?
Step 1: Request a commit in natural language (~2 min)
Open Claude Code in a Git repository and request a commit.
claude "commit the changes with a descriptive message"
Claude Code analyzes the git diff, identifies modified files, and generates a structured commit message following the Conventional Commits convention.
Verification: Run git log --oneline -1. You should see a message in feat:, fix:, or chore: format.
Step 2: Customize the message format (~2 min)
Configure the style of your commit messages via the CLAUDE.md memory system.
claude "add to CLAUDE.md: always use conventional format in English for commits"
Step 3: Validate the commit before execution (~1 min)
Verify that Claude Code asks for confirmation before each commit.
claude "show me the diff and propose a commit message"
Claude Code displays the complete diff and proposes a message. You retain control: nothing executes without your explicit validation.
If you see "nothing to commit, working tree clean": run git status to check that you have modified files. Check the common Git integration errors for specific cases.
How does intelligent message generation work?
Claude Code uses the context of your conversation to enrich the message. If you have discussed a bug for 10 minutes, the commit message will reflect that discussion.
| Approach | Example message | Context used |
|---|---|---|
| Classic Git | fix: bug fix | None |
| Basic Claude Code | fix: fix VAT calculation in cart | Diff only |
| Conversational Claude Code | fix(cart): fix VAT rounding at 20% on amounts > 1000 (#142) | Diff + conversation + issue |
Descriptive commit messages make code review easier, and contextual messages generated by Claude Code tend to be more detailed than an average manual commit.
Concretely, a conversational commit captures the intent behind a change, not just the list of modified files.
Key takeaway: Claude Code generates contextual commit messages from your conversation. Simply ask "commit" in natural language.
How to automate branches and pull requests?
Step 4: Create a thematic branch (~2 min)
Ask Claude Code to create a branch named after your task.
claude "create a branch to add the search feature"
Claude Code runs git checkout -b feat/add-search-feature and confirms the creation. The naming automatically follows the type/short-description convention.
Verification: Run git branch --show-current. You should see feat/add-search-feature.
Step 5: Create an automated pull request (~3 min)
After your commits, ask for the creation of a PR directly from Claude Code.
claude "create a pull request with a summary of the changes"
Claude Code uses the gh pr create command behind the scenes. It analyzes all the commits on the branch and writes a title, summary, and test checklist.
To explore the available options in more depth, check the complete Git integration guide which covers custom PR templates.
| PR Action | Claude Code command | Git/GH equivalent |
|---|---|---|
| Create a PR | "create a PR" | gh pr create --fill |
| List PRs | "show open PRs" | gh pr list |
| Review a PR | "review PR #42" | gh pr review 42 |
| Merge a PR | "merge PR #42" | gh pr merge 42 |
In practice, creating a PR via Claude Code is faster than assembling the title, summary, and checklist by hand in a manual workflow.
If you see "gh: command not found": install GitHub CLI with brew install gh then authenticate with gh auth login.
Key takeaway: Claude Code automates branch and pull request creation. Use natural language descriptions to get consistent naming.
How to resolve merge conflicts with Claude Code?
Step 6: Detect and resolve conflicts (~5 min)
Here is how to handle a merge conflict. First launch the merge that generates the conflict:
git merge develop
# CONFLICT (content): Merge conflict in src/utils.ts
Then ask Claude Code to resolve the conflict:
claude "resolve the merge conflicts in src/utils.ts"
Claude Code reads the <<<<<<<, =======, >>>>>>> markers and proposes a resolution by intelligently combining both versions. It explains each choice made.
Verification: Run git diff --check. No conflict marker should appear.
What types of conflicts does Claude Code handle?
Claude Code distinguishes three categories of conflicts and adapts its resolution strategy.
| Conflict type | Claude Code strategy | Reliability |
|---|---|---|
| Simple text conflicts | Contextual merge | Most reliable |
| Structural conflicts (imports, functions) | Context-aware merge | Often reliable, review recommended |
| Semantic conflicts (business logic) | Proposal + validation request | Requires your validation |
Concretely, Claude Code handles simpler text conflicts more reliably than complex semantic ones, and it asks for your validation when the intent is ambiguous.
You can also use the Git integration best practices to minimize conflicts upstream. Splitting branches into small units helps reduce the risk of conflicts.
If you see "I can't determine the intent of both changes": Claude Code is asking you to choose. Respond by specifying which version to keep or how to combine both.
Key takeaway: ask Claude Code to resolve your conflicts - it analyzes the context and proposes a smart merge that you validate.
How to use checkpoints and the Esc+Esc shortcut?
Step 7: Create a checkpoint before a risky change (~2 min)
A checkpoint is an internal save point in Claude Code, distinct from a Git commit. Launch the following command:
claude "create a checkpoint before refactoring the auth module"
Claude Code creates a snapshot of the current state of your files. This mechanism works independently of git stash: it saves the entire conversational context in addition to the code.
Step 8: Roll back with Esc+Esc (~1 min)
A single Esc interrupts Claude while it is working. To roll back, press Esc twice on an empty prompt (or run /rewind) to open the rewind menu, then select a checkpoint to restore your files and conversation context.
Here is how it works in practice:
- Press
Esconce to interrupt Claude if it is still working - On an empty prompt, press
Esc+Esc(or run/rewind) to open the rewind menu - Select a checkpoint to restore your files and conversation context to that point
Verification: Run git diff after restoring a checkpoint. The working tree should match the state captured at that checkpoint.
To discover other useful shortcuts and commands, explore the essential slash commands guide which references all available keyboard shortcuts.
The Esc+Esc shortcut opens the rewind menu, which restores files (and conversation context) to a previous checkpoint.
If you see that some files were not restored: run git restore . (or git checkout -- .) to revert to the last commit. Then check the common errors to diagnose the problem.
Key takeaway: checkpoints save code + context, and pressing Esc+Esc on an empty prompt (or running /rewind) opens the rewind menu to restore a previous checkpoint.
How to leverage git log and conversational history?
Step 9: Consult the history via Claude Code (~2 min)
Ask Claude Code to analyze your Git history in natural language.
claude "show me the last 10 commits with the modified files"
Claude Code runs git log --oneline --stat -10 and reformats the results into a readable summary. It identifies patterns: which files change together, what commit frequency, which authors contribute the most.
How to cross-reference Git history and past conversations?
The /resume command allows you to resume a previous conversation. Combine this feature with Git history to find the context of a change.
claude "why did we modify the auth.ts file last week?"
Claude Code cross-references git log and your previous conversations to provide a complete answer. This feature relies on the memory system described in the CLAUDE.md tutorial.
| Natural command | Git equivalent | Additional information |
|---|---|---|
| "who touched this file?" | git log --follow file | Conversational context |
| "when did we fix bug #42?" | git log --grep="#42" | Link with the discussion |
| "summarize this week's changes" | git shortlog --since="1 week" | Impact analysis |
| "compare with the main branch" | git diff main...HEAD | Difference summary |
Teams often spend significant time searching for the context of past modifications. Claude Code's conversational history makes it faster to recover the reasoning behind a change.
To structure your initial interactions and maximize history quality, follow the Your first conversations guide.
Key takeaway: Claude Code cross-references git log and conversational history to find the why behind each change, not just the what.
How to configure advanced Git workflows in Claude Code?
Step 10: Customize hooks and commit rules (~3 min)
Configure persistent rules in your CLAUDE.md file to standardize Git behavior.
# Git rules for this project
- Commit format: Conventional Commits in English
- Branches: prefix with feat/, fix/, chore/
- PR: always include a description and a test checklist
- Merge: use rebase to keep a linear history
These rules are automatically read at each session. Claude Code supports pre-commit hooks and can run automatic checks before each commit.
In practice, a well-configured CLAUDE.md file helps reduce Git workflow errors on a team project by keeping conventions consistent.
What complementary tools to use with Git integration?
The MCP protocol (Model Context Protocol) extends Claude Code's Git capabilities. Explore the possibilities offered by MCP to connect third-party tools like Jira, Linear, or Notion to your Git workflow.
To view ready-to-use configuration examples, refer to the Git integration code snippets.
| Advanced feature | Command | Result |
|---|---|---|
| Interactive rebase | "rebase on main squashing commits" | Clean linear history |
| Cherry-pick | "apply commit abc123 to this branch" | Targeted commit transferred |
| Bisect | "find the commit that introduced the bug" | Binary search |
| Named stash | "set aside my changes for later" | Stash with description |
If you want to deepen all the capabilities of Git integration, SFEIR Institute offers the Claude Code one-day training. You will practice advanced Git workflows on concrete labs, including rebase, cherry-pick, and complex conflict resolution.
To go further in automating your development workflow, the AI-Augmented Developer SFEIR training covers in 2 days Git integration combined with code generation, automated testing, and deployment. Experienced developers can then follow the Advanced level in 1 day to master autonomous agents and AI-driven CI/CD pipelines.
Key takeaway: customize your CLAUDE.md with Git rules and extend capabilities via MCP for a fully automated workflow.
How to go further with Git integration?
You now have a solid foundation for leveraging Claude Code's Git integration. Here are the paths to deepen your skills.
- Automate code review: ask Claude Code to review incoming PRs and suggest improvements
- Configure CI/CD workflows: connect Claude Code to GitHub Actions to trigger pipelines from a conversation
- Manage monorepos: use path filters to target commits to specific packages
- Analyze technical debt: request a report on file modification frequency to identify hotspots
Check the Git Integration page for an overview of all available features. The best practices will help you avoid common pitfalls in a team setting.
Teams trained by SFEIR Institute report that Git productivity tends to improve once Claude Code becomes part of the daily workflow.
Key takeaway: Claude Code's Git integration evolves with your practice. Start with conversational commits, then explore branches, PRs, and conflict resolution as you work on your projects.
Recent articles about Claude
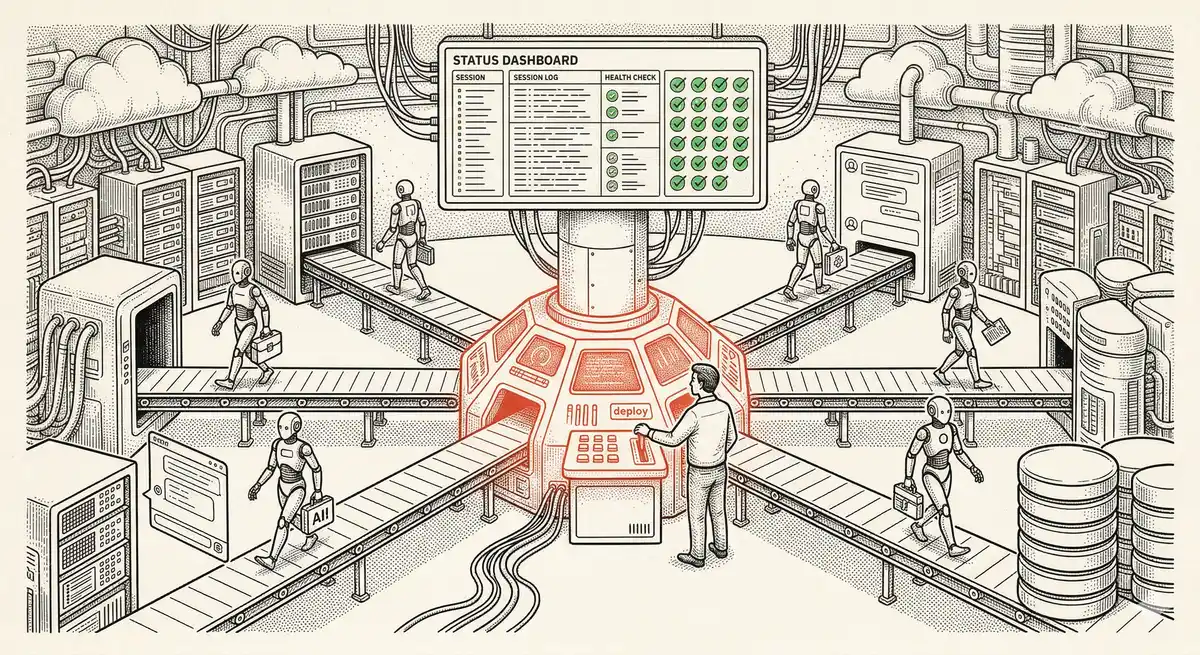
Claude Managed Agents: Anthropic's Platform for Production Agent Deployment
Anthropic launches Managed Agents: a cloud platform for deploying AI agents in production. Secure sandbox, checkpointing, multi-agent, autonomous sessions lasting hours. Notion, Rakuten, Asana and Sentry already use it.
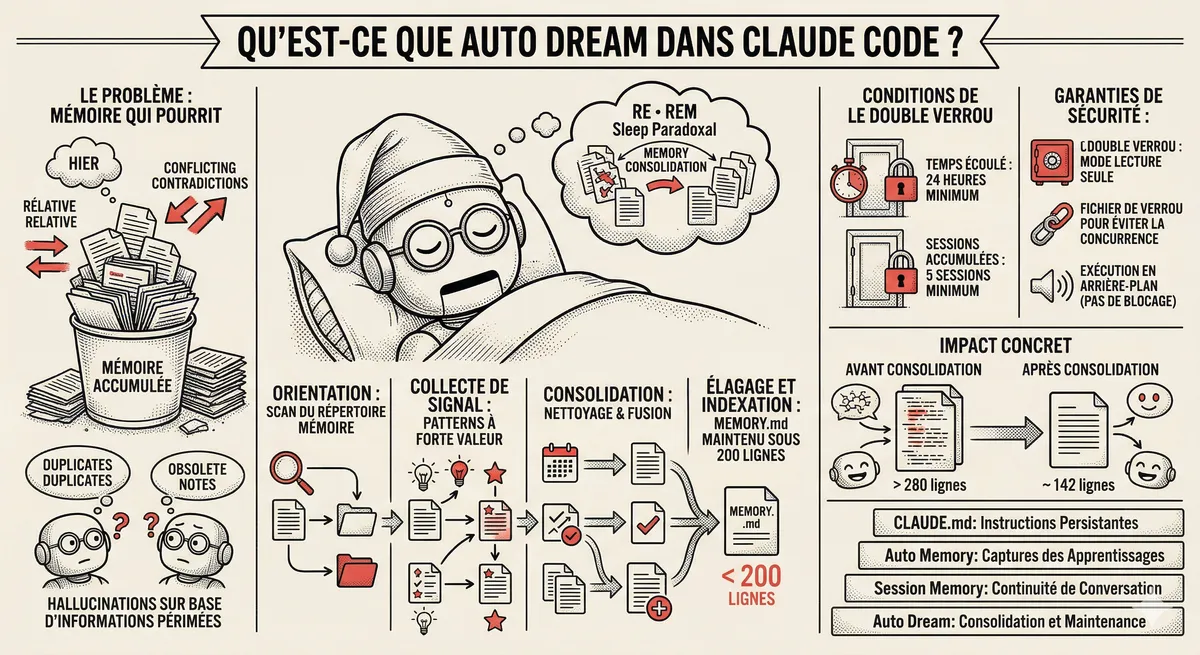
Claude Code Dream & Auto Dream: Automatic Memory Consolidation
After 20 sessions, Auto Memory notes become a mess. Auto Dream solves this by automatically consolidating Claude Code's memory: deduplication, stale entry removal, relative-to-absolute date conversion.
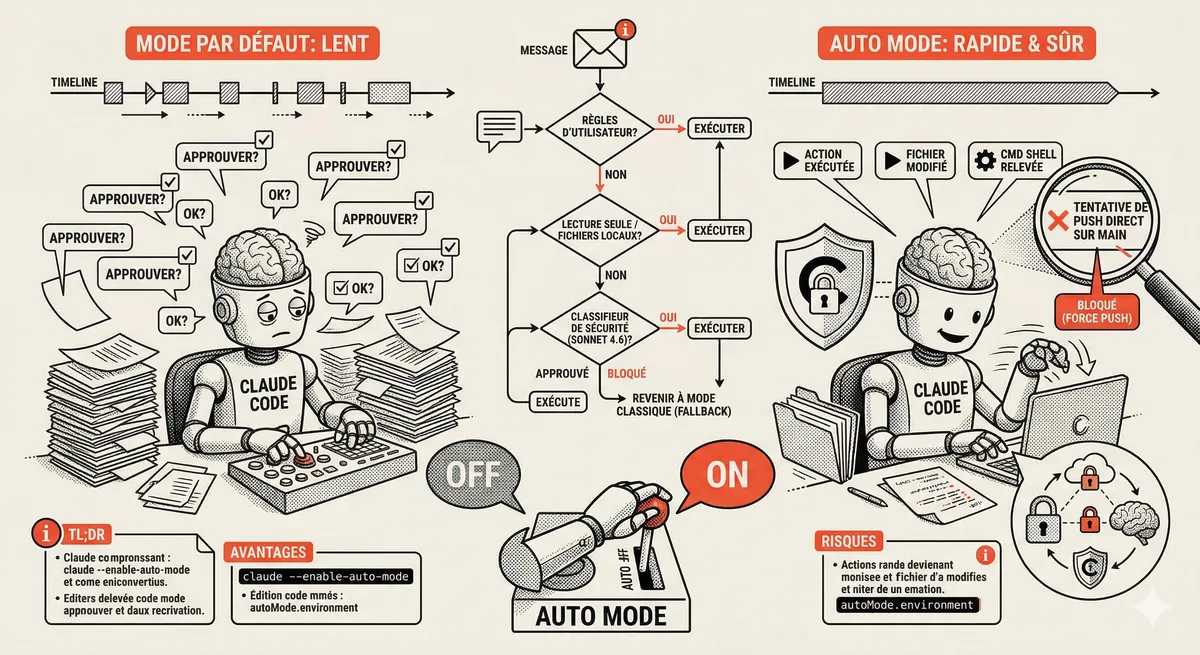
Claude Code Auto Mode: Autonomy Without the Risk
Auto Mode in Claude Code eliminates permission interruptions while keeping a safety net. A classifier analyzes every action before execution and blocks destructive operations. The sweet spot between approving everything and letting everything through.
Claude Code Training
Master Claude Code fundamentals in 1 day with our expert instructors. 60% hands-on practice on real-world cases.
Discover the training